WP Rocket is a caching plugin for WordPress that helps to improve the speed and performance of a website. It is designed to make a website load faster by caching static files, minifying code, and lazy loading images.
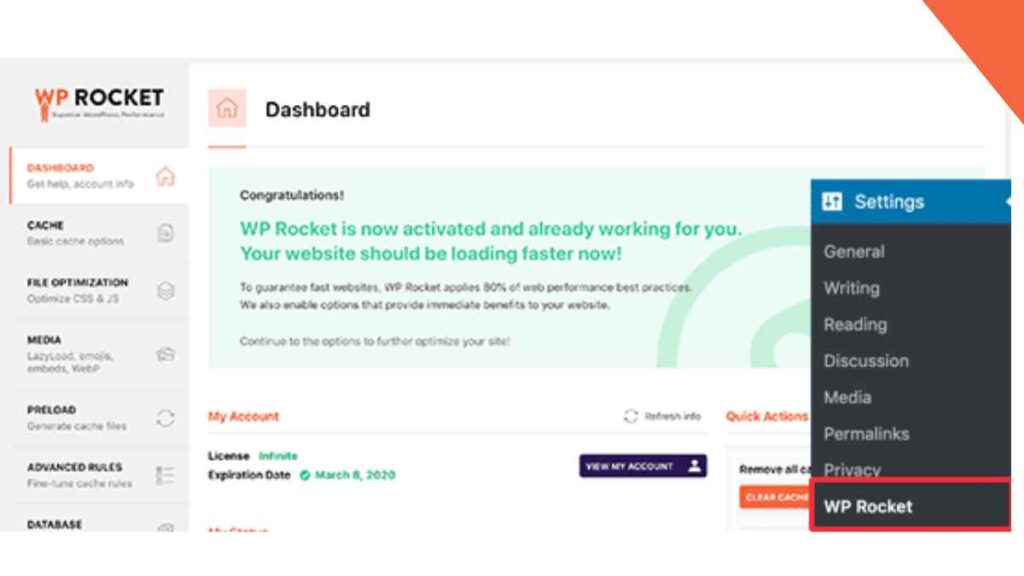
To use WP Rocket, you will first need to purchase the plugin and then install it on your WordPress site. Once installed, you can access the plugin’s settings by going to the “Settings” menu in the WordPress dashboard and selecting “WP Rocket.”

How to Use WP Rocket Plugin 2024 ?
From there, you can configure the plugin’s various settings to optimize your site’s performance. Some of the things you can do include:
- Enabling page caching to speed up page load times
- Minifying HTML, CSS, and JavaScript to reduce file size
- Lazy loading images to improve page load times
- Combining CSS and JavaScript files to reduce the number of requests made to the server
- Optimizing your database to reduce the size of your website’s files
Additionally, WP Rocket also provides features like preloading, Cloudflare integration, and lazy loading of iFrames.
It is important to note that while using the plugin can help speed up your site, you should still follow best practices for optimizing your site’s performance, such as using a fast and reliable hosting provider, optimizing images, and using a Content Delivery Network (CDN).
Read Also: What is gravity forms dynamic population ? 2024
Installing WP Rocket Plugin in WordPress
Installing the WP Rocket plugin in WordPress is a straightforward process. Here are the steps to follow:
- Purchase the WP Rocket plugin from the official website.
- Once you have completed your purchase, you will receive an email with a download link for the plugin. Click on the link to download the plugin to your computer.
- In your WordPress dashboard, go to Plugins > Add New.
- Click on the “Upload Plugin” button at the top of the page.
- Click on the “Choose File” button and select the WP Rocket plugin file that you downloaded earlier.
- Click on the “Install Now” button to begin the installation process.
- Once the installation is complete, you will see a “Plugin activated” message.
- You can now access the plugin’s settings by going to the “Settings” menu in the WordPress dashboard and selecting “WP Rocket.”
It’s important to note that after activating the plugin, you have to configure the plugin settings, like clearing the cache, configure the cache and preload options, as well as the file optimization options.
You should also check your website after activating the plugin to ensure that everything is working correctly and that your site’s speed and performance have improved.
Read Also: How to Add a Custom Scrollbar in WordPress 2024
Setting Up Caching Options in WP Rocket
Setting up caching options in WP Rocket is an important step in optimizing your website’s performance. Here are the steps to follow to set up caching options in WP Rocket:

- Log in to your WordPress dashboard and go to the “Settings” menu. Select “WP Rocket.”
- In the “Cache” tab, you will see options to enable caching for mobile devices, logged-in users, and SSL pages. You can enable or disable these options depending on your website’s needs.
- The “File Optimization” tab lets you minify and combine files to reduce their size and the number of requests made to the server. You can enable or disable options for minifying HTML, CSS, and JavaScript files.
- In the “Media” tab, you can enable the “LazyLoad” option to speed up page load times by delaying the loading of images until they are visible on the screen.
- The “Preload” tab lets you configure options for preloading pages and links on your website. This can help to speed up the time it takes for pages to load for first-time visitors.
- Once you have finished configuring your caching options, click on the “Save Changes” button at the bottom of the page.
It’s important to note that WP Rocket provides you with many other options such as Cloudflare integration, lazy loading for iFrames, and more. Be sure to check the plugin documentation to know more about these options.
After configuring the caching options, it’s recommended to check the website to see if there are any changes or issues that arise. Additionally, It’s also a good idea to run website speed tests before and after activating the plugin to measure the improvements in your website’s performance.
Read Also: How to Use Black widgets For Elementor
How to Buy WP Rocket Plugin ?
You can purchase WP Rocket from the official website, https://wp-rocket.me/
Here are the steps to buy WP Rocket:
- Go to the WP Rocket website and click on the “Buy” button on the homepage.
- Select the plan that best suits your needs. WP Rocket offers a single site, three-site, and an unlimited site license.
- Enter your personal information, including your name and email address, and select your payment method. You can pay via credit card or PayPal.
- Review and agree to the terms of service and privacy policy.
- Click on the “Complete Purchase” button to complete the transaction.
- You will receive an email with a download link for the plugin. Click on the link to download the plugin to your computer.
Once you’ve downloaded the plugin, you can install it on your WordPress website, as per the instructions I provided earlier in the answer.
Keep in mind that WP Rocket comes with a 14-day money-back guarantee, so you can try the plugin risk-free. It’s also worth noting that WP Rocket offers a free trial of their plugin, so you can test it before buying.
Read Also: How to Create Sticky Footer Ads for Blogger & WordPress


